
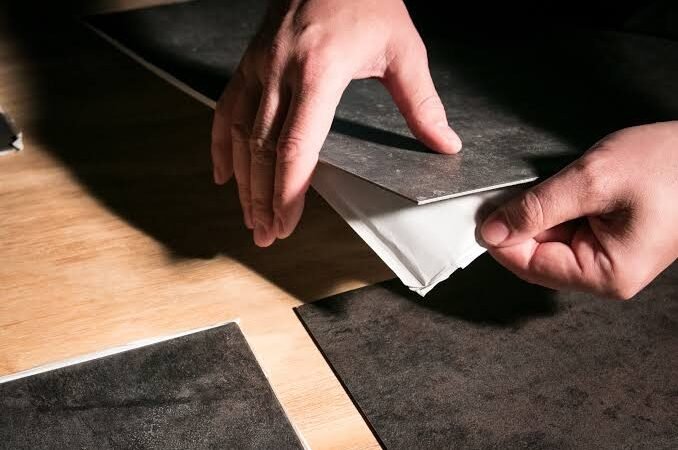
Peel and stick floor tiles are a simple way to give an old floor a fresh look without mortar, grout, or a long installation process. The tiles already have adhesive on the back, so the basic idea is simple: prepare the floor, peel off the backing, and stick the tile in place.
But getting a good result takes more than just peeling and sticking. If the floor is dirty, uneven, damp, or not properly prepared, the tiles may not stay down well. A poor starting point or a rushed cut can also leave the finished floor looking uneven.
This guide covers the full process, from checking and preparing the floor to measuring, planning the layout, cutting tiles, and fitting them around areas such as door frames and toilets. It also covers common installation mistakes and what to do when a tile does not stick or goes down the wrong way.
If peel and stick flooring is still new, you need to see the beginner’s guide to peel and stick flooring to understand the different types, how they work, and where they can be used before getting started.
How to Prepare the Floor for Peel and Stick Tile
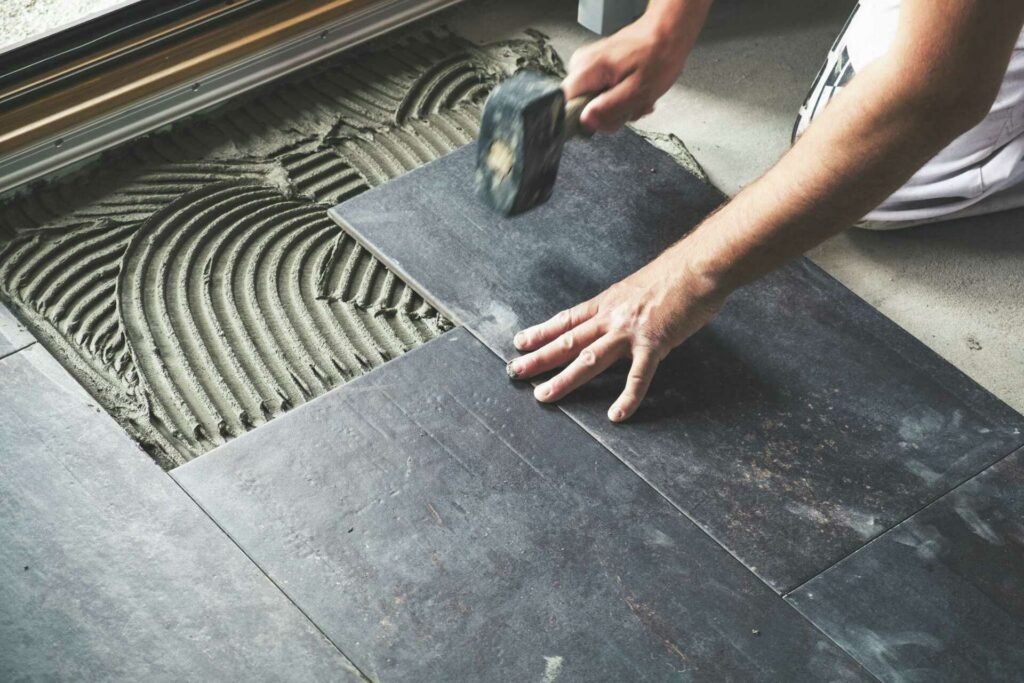
Before you start installing peel and stick floor tiles, give the floor a quick check. The adhesive needs a clean, dry, and smooth surface to hold well. If there is dirt, grease, moisture, or a bump underneath, the tile may not stick properly or may show the problem after it is installed.
- Start With a Clean Floor
Sweep or vacuum the whole area to remove dust and loose dirt. If the floor has grease, wax, or other sticky residue, clean it off as well. These things can get between the adhesive and the floor, making it harder for the tile to stay in place.
After cleaning, let the floor dry completely. Don’t rush this part, especially if water or a cleaning product was used.
- Fix Bumps, Cracks, and Uneven Spots
Now run your hand over the floor and look closely at the surface. Small problems can become easy to see once the new tiles are down.
Fill holes and cracks, smooth out raised spots, and deal with deep grout lines or other areas that could stop the tile from sitting flat. If an old floor is loose or damaged, that problem should be fixed before covering it with new tiles.
You don’t need a brand-new floor underneath. It just needs to be clean, dry, smooth, flat, and firm.
- Check the Floor One More Time
Before moving on, take a final look at the whole area. If you can still see dirt, feel large bumps, or find loose parts of the old floor, stop and fix them first.
A simple preparing floor checklist can save a lot of trouble later:
| Floor Check | What the Floor Should Be |
| Clean | Free of dust, grease, wax, and dirt |
| Dry | No wet or damp areas |
| Smooth | No large bumps or rough spots |
| Flat | No deep dips or raised areas |
| Firm | No loose or moving sections |
Once the floor passes these checks, you’re ready to measure the room and plan where the tiles will go.
Tools and Materials for Peel and Stick Tile Installation
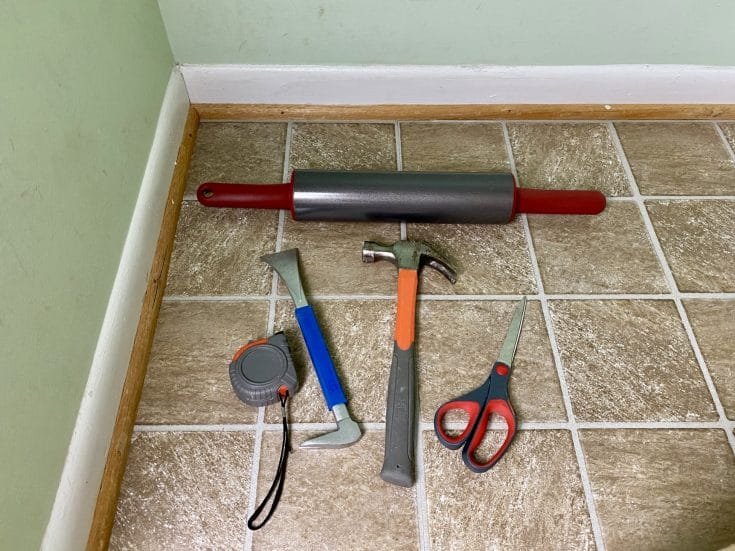
You don’t need a long list of special tools for this project. Most of the work can be done with a few basic items already found in a home toolbox. The exact tools can change a little depending on the type of tile and the cuts the room needs. Always check the tile’s instructions before starting.
1. The Basic Tools You’ll Need
| Tool | What You’ll Use It For |
| Measuring tape | To measure the room and tile cuts |
| Pencil | To mark cut lines and layout points |
| Utility knife | Cutting vinyl tiles |
| Straightedge or square | To keep cuts straight |
| Broom or vacuum | For removing dust before installation |
| Level | To check your layout lines |
| Floor roller | Pressing the tiles firmly onto the floor |
However, a floor roller is not needed for every product, but it can be helpful for pressing the tiles down evenly after they are installed. Some products may also call for different tools, so you should consider the manufacturer’s instructions first.
2. A Few Things That Can Make the Installation Easier
A chalk line can help when you need long, straight layout lines across the room. A piece of cardboard can also come in handy when a tile needs to fit around an odd corner or another awkward shape. You can make a simple template first, check that it fits, and then use it to mark the actual tile.
Keep a few extra utility knife blades nearby too. A sharp blade makes cleaner cuts and is easier to control than one that has become dull. Before starting, it is a good idea to have some extra tiles for cuts, mistakes, and future repairs.
How to Measure the Room for Peel and Stick Floor Tiles
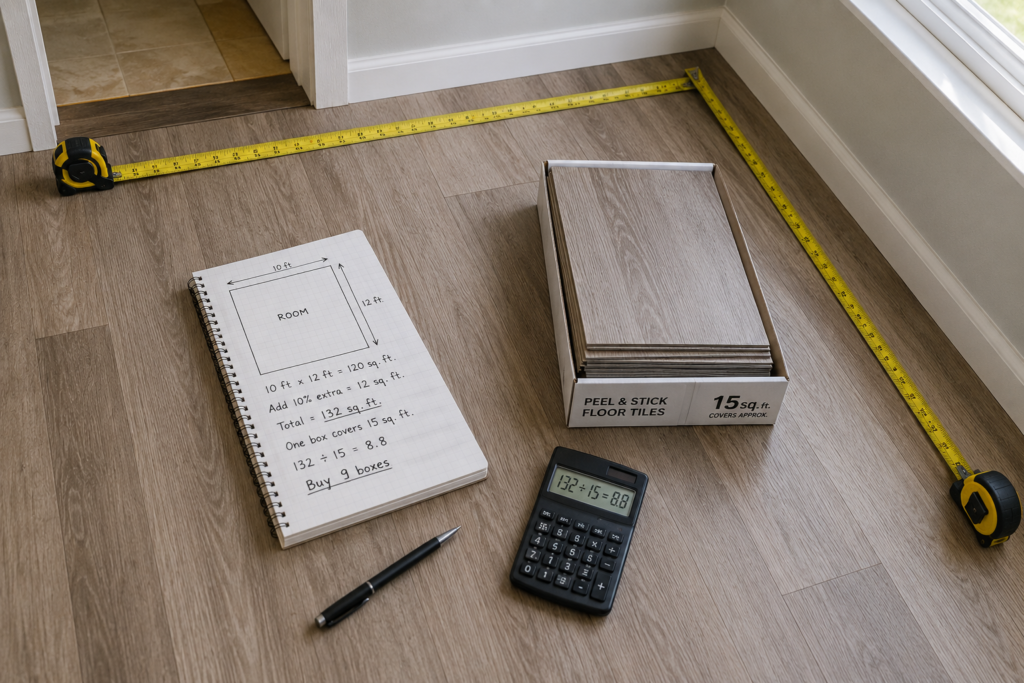
Once the floor is ready and the tools are nearby, the next step is to find out how much flooring you need. This is worth doing before opening the tiles because running short halfway through the job can leave you with a floor that cannot be finished in one go.
Some tiles will need trimming to fit neatly along walls, corners, and other edges. Follow our guide on how to cut peel-and-stick tiles cleanly to get the right fit before sticking them down.
1. Measure the Length and Width
For a simple square or rectangular room, measure the length and width of the floor in feet.
Then multiply the two numbers:
Length × Width = Floor Area
For example, if a room is 10 feet long and 12 feet wide:
10 × 12 = 120 square feet
So the room has about 120 square feet of floor space.
If the room has an odd shape, split it into smaller rectangles. Measure each part, work out its area, and then add the numbers together.
2. Add Extra Tiles for Cuts and Mistakes
Don’t buy exactly the amount your room needs. Some tiles will need to be cut along walls, around door frames, or in other tricky spots. A few pieces may also be wasted if a cut goes wrong.
A common starting point is to buy about 10% extra, but the amount can vary depending on the room and the tile pattern. Hence, it is better if you check the product’s instructions before placing the order. (lowes.com)
| Floor Area | About 10% Extra | Total to Plan For |
| 50 sq. ft. | 5 sq. ft. | 55 sq. ft. |
| 100 sq. ft. | 10 sq. ft. | 110 sq. ft. |
| 120 sq. ft. | 12 sq. ft. | 132 sq. ft. |
| 150 sq. ft. | 15 sq. ft. | 165 sq. ft. |
For example, a 120-square-foot room would need around 132 square feet of material if using a 10% allowance.
3. Check How Much One Box Covers
The number on the box is usually based on the total square footage that the tiles cover. Divide the amount of flooring you need by the coverage of one box to find out how many boxes to buy.
If one box covers 15 square feet and the project needs about 132 square feet:
132 ÷ 15 = 8.8
That means 9 boxes would be needed.
It’s better to have a few tiles left over than to stop the project because one more box is needed. Extra tiles can also be useful later if a damaged tile needs to be replaced.
Once you know how much flooring you need, don’t start sticking the tiles down yet. The next step is to plan where the first tiles will go and check how the rows will finish at the walls.
How to Plan the Layout Before Installing Peel and Stick Tiles
Now that you know how much flooring you need, don’t peel the backing off just yet. Take a few minutes to plan the layout first. This small step can make the finished floor look much cleaner and can save you from wasting tiles later.
1. Find a Good Starting Point
For most rooms, it helps to find the center of the floor and use it as a guide. Measure the room from both directions and mark the middle points. You can then draw two straight lines that cross at the center.
If the room is not a simple shape, choose the most visible area as your starting point and adjust the layout around doors, cabinets, or other fixed areas.
2. Dry-Lay the First Few Tiles
Before removing any backing, place several tiles on the floor where they will go. This is called a dry layout. The tiles are not being stuck down yet, so you can move them around if something does not look right.
Look at where the tiles will end along each wall. You don’t want one side of the room to have full tiles while the other side ends with tiny strips. If the cuts look too small, shift your starting lines and check again.
Tip: It is much easier to move a loose tile than to fix one after the adhesive has bonded to the floor.
3. Check the Pattern Before You Stick
If the tiles have a wood, stone, or repeating pattern, look at how the designs meet from one tile to the next. Some patterns need to be turned or staggered in a certain way.
Take a step back and look at the whole layout. Check the doorway, the most visible wall, and any area that will be seen often. A few extra minutes here can prevent a pattern from looking uneven once the tiles are stuck down.
4. Make Sure the First Tile Is Straight
The first tile sets the direction for the rest of the floor. If it starts at an angle, that small mistake can become more noticeable as more tiles are added. Installation guides also recommend using straight reference lines and checking the first tiles before committing to the adhesive.
Once the layout looks balanced and the guide lines are straight, you’re ready to start installing the tiles.
How to Actually Install Peel and Stick Floor Tiles
With the floor prepared and the layout planned, it’s time to start sticking the tiles down. This is the part where taking your time really helps. The first few tiles set the direction for the rest of the floor, so there is no need to rush through them.
However, before installation, it is worth considering how peel-and-stick tiles perform in everyday use and whether they make sense for the space.
Step 1: Start With the First Tile
- Go back to the guide lines you marked during the layout. Place the first tile along those lines and check that it is straight before removing the backing.
- Once you’re happy with its position, peel away the backing. Try not to touch the sticky side with your hands, since dirt, dust, and oils can affect the adhesive.
- You need to place the tile carefully and press it down from the center toward the edges. Take a moment to check it again before moving on. If the first tile is crooked, the mistake can carry through the next rows.
Step 2: Add the Next Tiles
- Place the next tile beside the first one, keeping the edges lined up according to the instructions for your particular tile. Peel the backing only when you’re ready to install it.
- Work across a small section at a time instead of trying to cover the whole room at once. This makes it easier to keep the tiles straight and spot a problem before it spreads across the floor.
- If your tiles have a pattern, check the design before sticking each one. Some tiles need to be turned or placed in a certain direction to keep the pattern looking right.
Step 3: Press Each Tile Firmly
- After placing a tile, press it firmly over the whole surface. Pay extra attention to the edges and corners, where a loose spot can start later.
- A floor roller can make this job easier and helps apply even pressure across the tile. Some products have specific rolling or pressure instructions, so follow the directions that come with your flooring.
Step 4: Keep Checking Your Rows
- Every few tiles, stop and look back at the floor. Check that the rows are still straight and that the seams are lining up the way you planned.
- It’s much easier to correct a small problem after a few tiles than after the entire room is finished.
A simple rule: don’t let speed decide where the tiles go. Place each tile carefully, press it down well, and check the next one before continuing.
How to Cut Peel and Stick Floor Tiles
Not every tile will fit the space perfectly. You will usually need to cut some pieces along walls, around door frames, or near other fixed areas. Straight cuts are fairly simple, but it helps to measure carefully before making the first cut.
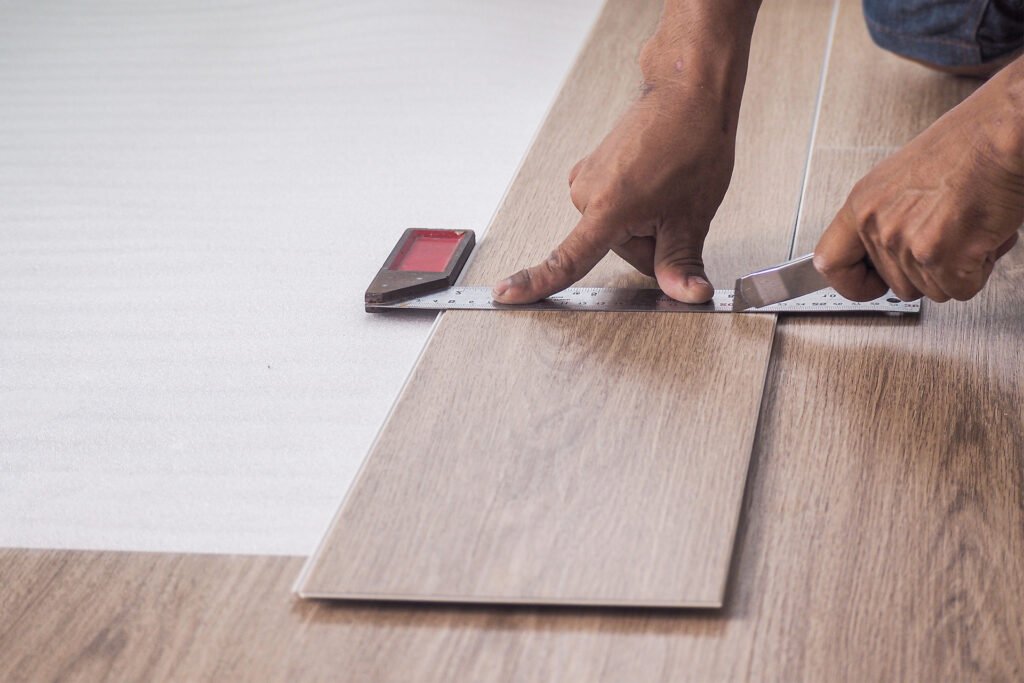
- Measure the Space First: Place the tile where it needs to go, but keep the backing on for now. Mark the part that needs to be removed with a pencil. It’s better to mark the tile while it is still loose than to guess after the backing has been removed. If the cut is wrong, you can make another mark or adjust it before the tile becomes permanent.
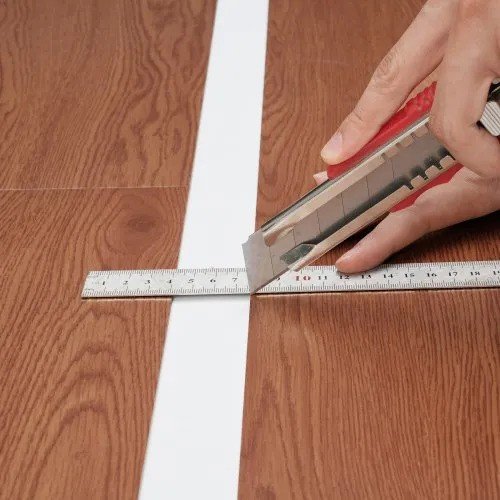
- Make Straight Cuts With a Sharp Blade: For many vinyl peel and stick tiles, a sharp utility knife and a straightedge are enough for simple cuts. Place the tile on a safe cutting surface, line up the straightedge with your mark, and carefully score along the line. Don’t try to force the knife through the tile in one hard push. A controlled cut is easier to manage and can leave a cleaner edge. Always keep your hands away from the path of the blade and use a proper cutting surface.
- Check the Cut Before Removing the Backing: This is an easy step to skip, but it can save a tile. Put the cut piece in its place with the backing still on. Check the fit against the wall or other edge. If it is too large, you can trim it. If it is too small, you will know before wasting the adhesive.
For awkward shapes, a small piece of cardboard can be used as a template. Trim the cardboard until it fits the space, then trace its shape onto the tile. This works well for corners and other areas that are hard to measure with a straight line.
Tip: Measure twice and cut once. A few extra seconds spent checking the fit can save an entire tile.
Common Installation Mistakes
Even simple peel and stick flooring can go wrong when a few basic steps are skipped. Most problems come from the surface, the layout, or rushing the installation.
| Mistake | What Can Happen |
| Installing over a dirty floor | The adhesive may not hold well |
| Ignoring bumps or deep grout lines | Uneven areas can show through |
| Starting with a crooked tile | The whole row can drift |
| Removing the backing too early | The tile may stick in the wrong place |
| Not pressing the tiles firmly | Edges may lift later |
| Forgetting to check the pattern | The finished floor may look uneven |
After Installing the Tiles
Once all the tiles are down, don’t immediately start moving heavy furniture around the room. Walk over the floor and check the seams, edges, corners, and cut pieces.
Look for any tile that feels loose or has an edge that is not sitting flat. If something looks wrong, it is easier to deal with it now than after the room is back in use.
Give the adhesive the amount of time recommended by the tile manufacturer before putting the floor under heavy use. Different products can have different instructions, so the box or installation guide should be the final word.
What If a Tile Goes Down Wrong?
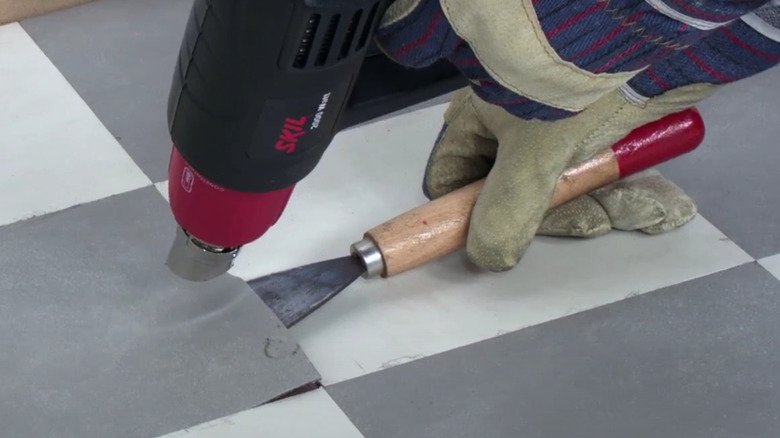
Don’t panic if one tile doesn’t go exactly as planned. What you can do depends on the type of tile and its adhesive, so check the product instructions before trying to lift it. If the tiles start lifting or do not stay attached after installation, see why peel-and-stick floor tiles may not be sticking and what can be done to fix the problem.
| Problem | What Causes It |
| Tile is crooked | Check whether the adhesive allows repositioning |
| Edge is lifting | Check the surface and press the edge firmly |
| Bubble is underneath | Check whether the tile was pressed down evenly |
| Cut is too large | Trim it carefully before fixing it in place |
| Cut is too small | Use a new piece rather than leaving a large gap |
If a tile keeps lifting after it has been installed, don’t simply keep pressing it down. Look at what is underneath it. A dirty, damp, uneven, or unsuitable surface may be the real reason it won
FAQs
Can peel and stick floor tiles be removed?
They can usually be removed, but how easily they come up depends on the adhesive, how long they have been installed, and the surface underneath. Removing them may also leave adhesive behind or affect the old flooring.
Can peel and stick tiles be used in a bathroom?
Some products can be used in bathrooms, but the product must be rated for that type of space. Water can also reach the seams and edges, so good installation and proper care matter. Always check the manufacturer’s instructions before using them in a bathroom.
What is the best way to install peel and stick tile?
The best approach is to prepare the floor properly, plan the layout, start with straight tiles, make careful cuts, and press each tile firmly into place. Rushing any of these steps can lead to loose, crooked, or poorly fitted tiles.
Do peel and stick floor tiles need glue?
Usually, no extra glue is needed. The tiles already have a pressure-sensitive adhesive on the back. Simply peeling off the backing exposes the adhesive. However, always follow the instructions for the specific product being installed.
Can peel and stick floor tiles be installed over existing tile?
Yes, in some cases. The existing tile should be firmly attached, clean, dry, and reasonably smooth. Deep grout lines, loose tiles, or uneven areas may need to be fixed before installation.
Final Thoughts
Installing peel and stick floor tiles does not have to be a difficult project. The tiles are simple to work with, but the finished result depends heavily on what happens before the backing is removed.
Take time to prepare the floor, plan the layout, and check each cut before sticking it down. Work slowly around corners, door frames, and other difficult areas, and keep checking the rows as you move across the room.
A little extra time at the start can make the whole installation easier and leave you with a floor that looks much cleaner when the job is done.