
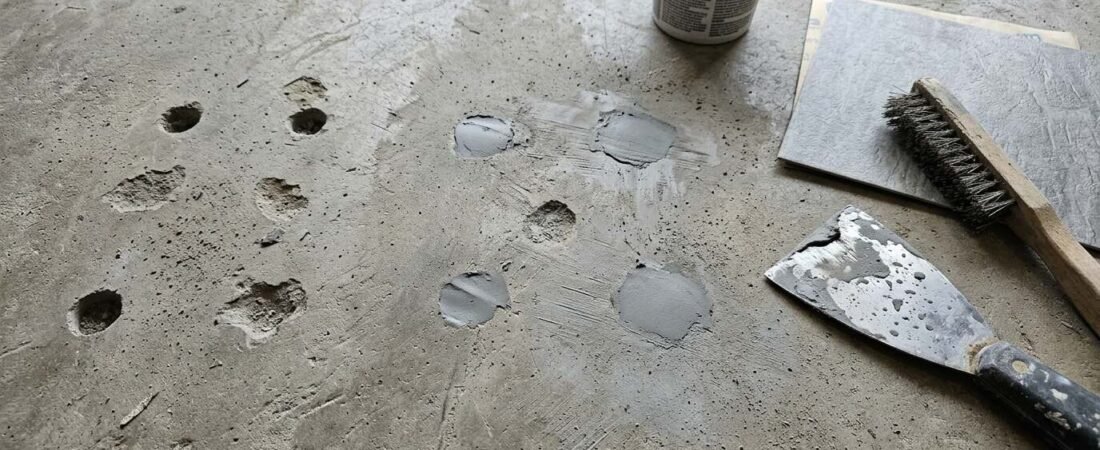
Before you install peel and stick tiles on a concrete floor, check for cracks, holes, and damaged spots. These tiles are thin, so even small flaws in your concrete can show through the finished floor. For example, a hole can leave a space under a tile, while a raised edge around a crack can make the surface uneven. That is why you need to repair these areas before you lay your tiles.
Crack repair is only one part of preparing your floor, so read our complete guide to installing peel and stick tiles on concrete to learn what else your slab needs before installation.
However, you should not use the same repair method for every problem. A small surface crack needs a different approach than a deep hole or a broken piece of concrete. So, check the damage first to choose the right repair material and avoid problems later.
In this guide, you will learn how to fill cracks and holes in your concrete slab, which materials to use, and how long to wait before installing your peel and stick tiles.
Check Your Concrete for Hidden Cracks and Dents (Telegraph Test)
Before you repair your concrete floor, you need to find the cracks, holes, and raised spots that could show through your peel and stick tiles. This is called telegraphing, which means a flaw under the tile becomes visible on the surface because the tile is too thin to hide it. That is why you should check the entire floor before you start filling damaged areas.
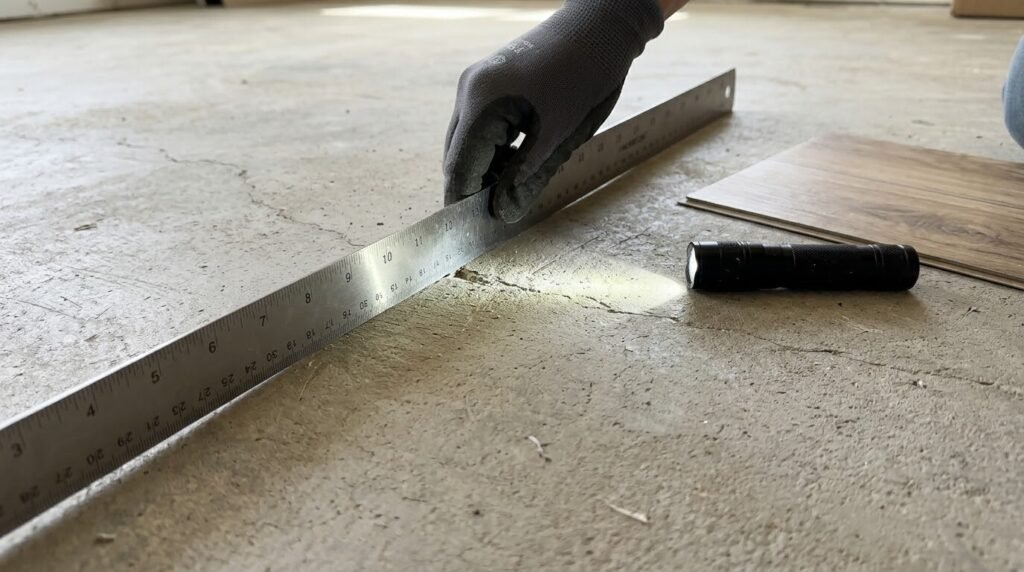
You can do this simple check at home without special tools. Follow these steps to find the flaws that need attention.
- Sweep and vacuum the floor. Remove dust and loose dirt first because they can hide small cracks and holes. A clean surface also makes it easier to spot damage.
- Check the floor with a flashlight. Hold a flashlight close to the concrete and shine the light across the surface. The low angle helps you see small shadows around cracks, holes, and raised spots that might be hard to notice under normal lighting.
- Use a straightedge. Place a long, flat board or level on different parts of your floor. Look for gaps underneath it, and check whether it rocks from side to side. These signs can help you find low and raised areas that need attention.
- Feel the surface with your hand. Slowly move your palm across the concrete to check for rough edges, small ridges, and raised spots. However, use your eyes and the straightedge too, because your hand alone may not reveal every problem.
- Mark the damaged areas. Use chalk or painter’s tape to mark each crack, hole, and raised spot you find. This way, you can locate every problem easily when you begin the repairs.
Once you finish this check, you will have a clearer idea of what needs fixing before you install your peel and stick tiles. You can then choose the right repair material for each damaged area instead of missing a flaw that could show through your new floor.
Best Filler for Concrete Cracks Under Peel and Stick Tile
For most cracks and small holes, choose a cement-based crack filler or floor patch approved for vinyl flooring. However, the right product depends on your repair because a shallow low spot may need a different filler than a deep hole.
Avoid ordinary caulk and silicone because your peel and stick tile adhesive may not bond well to them. Instead, check the product label to make sure the filler suits your concrete floor and the tiles you plan to install.
Once you fill the cracks and holes, you may also need a suitable primer to prepare your concrete for peel and stick tiles. Read our guide to the best concrete primers for peel and stick tiles to choose the right option for your floor.
Tools and Materials You Need to Fill Concrete Slab
You only need a few basic tools to fill cracks and holes in your concrete floor. Gather these materials before you start:
- Concrete crack filler or cement-based patch: To fill cracks and holes.
- Putty knife or small trowel: To apply and smooth the filler.
- Wire brush or small chisel: To remove loose concrete.
- Broom and vacuum: To remove dust and debris.
- Straightedge: To check the repaired surface.
- Sandpaper or sanding block: To smooth the repair if the product allows it.
- Chalk or painter’s tape: To mark damaged areas.
- Safety glasses and a dust mask: To protect yourself from dust and debris.
Which Concrete Cracks and Holes Need Filling Before Peel and Stick Tiles?
Not every crack or hole in your concrete floor needs the same repair. The right fix depends on how wide the crack is, whether its edges are smooth, and how deep the damage goes. Use this guide to decide which areas need filling before you install peel and stick tiles.
| What You See | What to Do | Suitable Repair Material |
| Hairline crack that is flat and smooth | May not need filling if it meets your flooring product’s requirements | Crack filler or thin patch, if needed |
| Hairline crack with a rough or raised edge | Fill the gap and smooth any raised edge | Compatible cement-based crack filler |
| Crack wider than 1/8 inch | Fill it with a suitable repair product | Cement-based crack filler or patch rated for vinyl flooring |
| Small hole or chip | Remove loose bits, fill the hole, and smooth the surface | Compatible cement-based patch |
| Large hole or gouge | Fill it according to the product’s depth and layer limits | Cement-based concrete patch |
| Shallow low spot | Use a suitable patch to bring the area level with the surrounding floor | Floor patch approved for vinyl flooring |
How to Fill Cracks in a Concrete Slab (Step by Step)
Cracks can leave gaps and weak spots in your concrete floor, so you need to fill them before installing peel and stick tiles. Follow these four steps to prepare the damaged area for your new tiles.
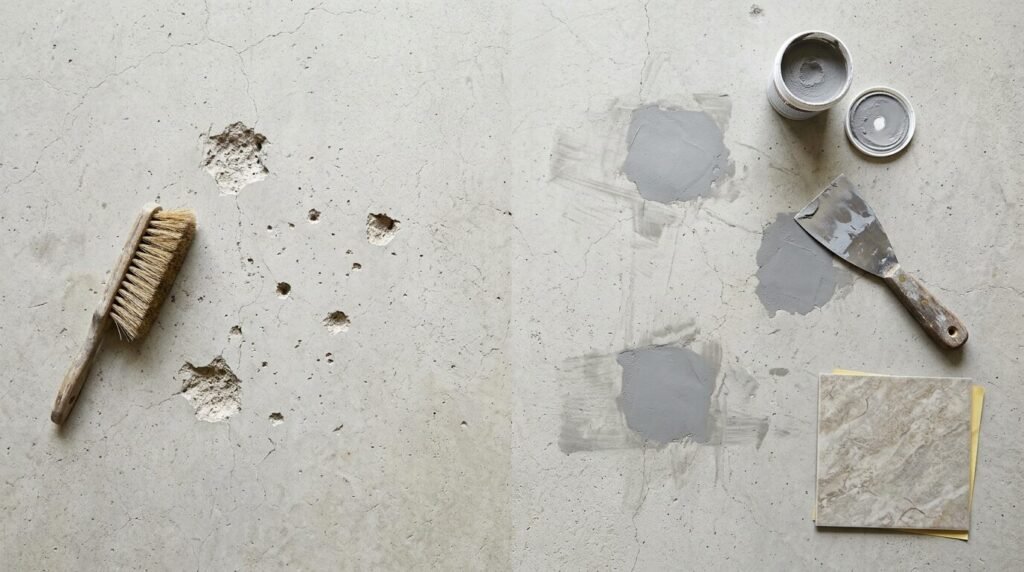
Step 1: Remove Loose Concrete and Dust
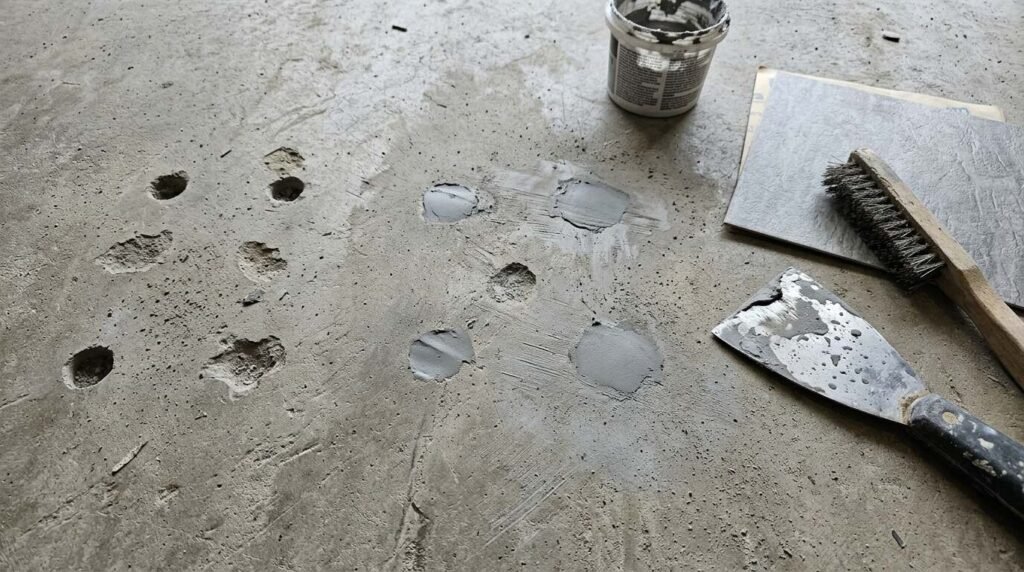
First, use a wire brush or small chisel to remove loose concrete from the crack. Then vacuum the dust and debris so the filler can stick to the clean surface. Make sure you remove all loose material before moving to the next step.
Step 2: Press the Filler into the Crack
Once the crack is clean, prepare your concrete filler according to the product instructions. Use a putty knife to press the filler into the crack and fill the empty space. Make sure you fill the crack properly so no gaps remain.
Step 3: Smooth the Filler with the Concrete
After filling the crack, scrape off the extra filler with your putty knife. Keep the repaired area even with the surrounding concrete because raised or low spots can show through thin peel and stick tiles.
Step 4: Let the Repair Dry and Harden
Once you smooth the filler, leave it alone for the time stated on the product label. Although the surface may feel dry, the filler might need more time to harden fully. Therefore, wait until the repair is completely ready before installing your peel and stick tiles.
How to Make the Patch Flat So It Doesn’t Show Through the Tile
Before you install peel and stick tiles, make sure your concrete patch is even with the rest of your floor. Otherwise, you may see a raised spot or bump through the thin tiles.
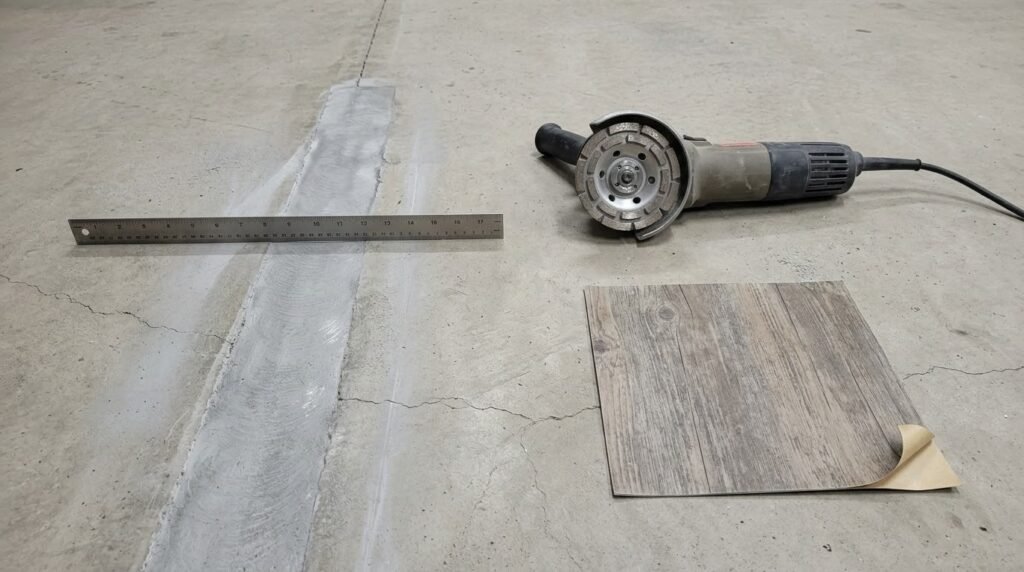
If your patch sits too high, sand or grind it down if the repair material allows it. Then smooth the edges so they blend into the surrounding concrete. Finally, place a straightedge over the patch and run your hand across the surface to check for raised spots.
How to Fill Holes and Chips in Concrete Before Peel and Stick Tiles
Before you install peel and stick tiles, check your concrete floor for holes, chips, and damaged spots. Small holes are usually easy to repair, while larger or deeper holes may need more filler and extra drying time. So, identify the type of damage first to choose the right repair method.
1. Check for Small holes and chips
Remove loose bits and dust, then press a suitable concrete patch into the hole. Scrape off the extra filler so the repair is even with the surrounding floor.
2. Clean Larger holes and gouges
Clean out loose concrete and debris before filling the damaged area with a suitable patch. Then smooth the surface to match the rest of the floor.
3. Notice Deep holes
If the repair product allows it, fill the hole in layers rather than adding too much filler at once. Let each layer set as directed before adding the next one.
A Tip to Fill Pinholes and Surface Pits
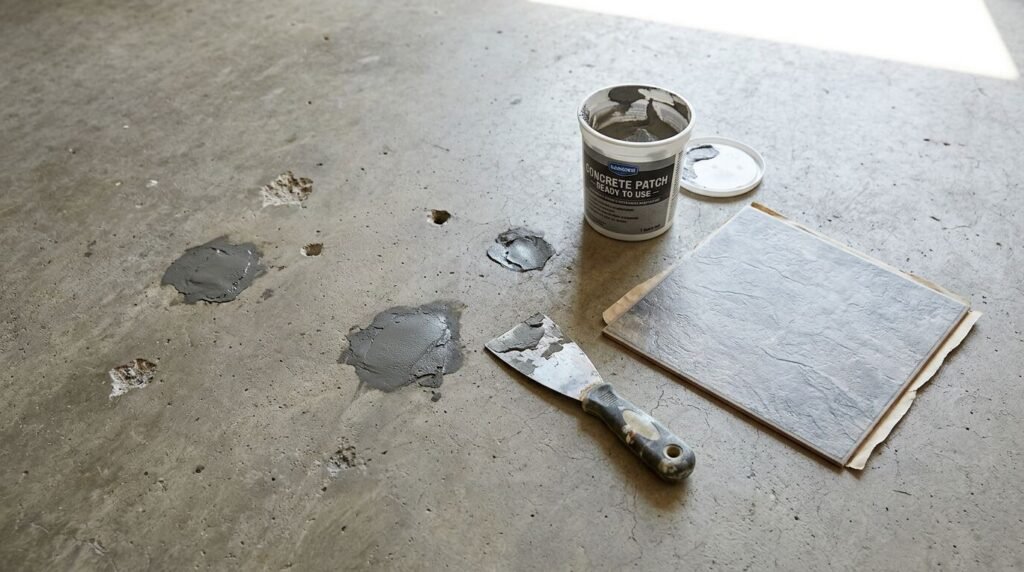
Pinholes are tiny pits in the top of your concrete floor. Although they may look harmless, they can leave small gaps under thin peel and stick tiles. To fix them, spread a thin layer of suitable floor patch over the pitted area and press it into the holes. Then scrape away the extra material to create an even surface.
Repair Deep Holes and Crumbling Concrete
If the concrete around a hole feels loose or crumbly, remove the weak material first. Otherwise, the patch may not hold properly because it needs a firm surface underneath. Once you reach solid concrete, vacuum the dust and fill the hole with a suitable repair product. For deep damage, follow the product instructions on layer thickness and drying time before adding more filler.
Fix a Raised Crack in Concrete Before Peel and Stick Tiles
Sometimes, one side of a concrete crack sits higher than the other. This creates an uneven step that can show through thin peel and stick tiles. So, filling the crack alone will not fix the problem. You need to make the raised edge even with the surrounding floor before filling the crack.
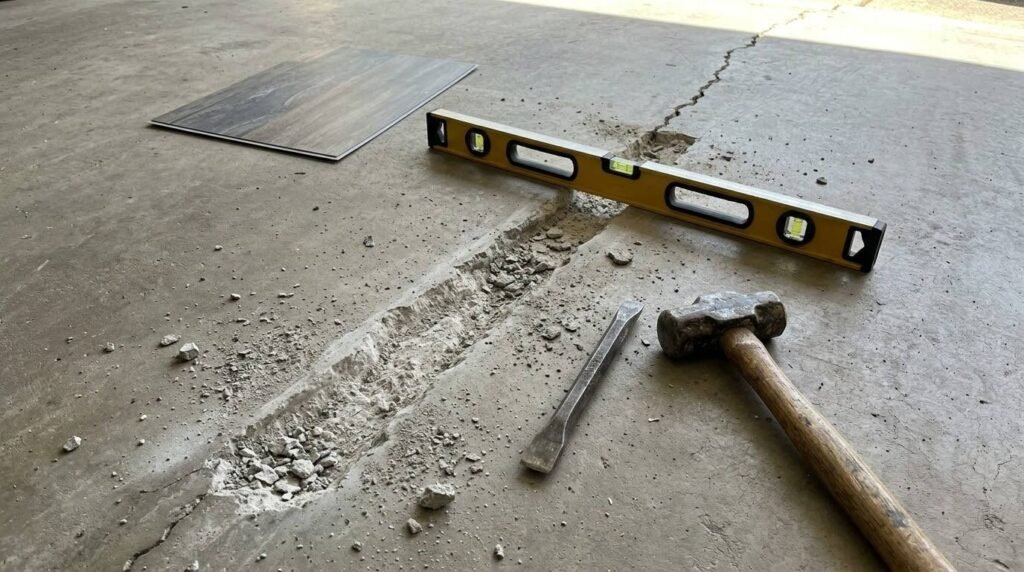
Here is how to repair it:
- Check the raised edge. Run your hand or a straightedge across the crack to find which side sits higher.
- Smooth the high edge. Carefully sand or grind down the raised concrete, if the slab and repair conditions allow it, until both sides are level.
- Fill the crack. Remove loose concrete and dust, then press a suitable concrete crack filler into the gap. Follow the repair product instructions.
- Smooth the patch edges. Spread the filler thinly beyond the crack so the repaired area blends into the surrounding concrete without leaving a raised ridge.
Once the repair has dried and hardened as directed, check the area with a straightedge. The surface should be firm and even before you install your peel and stick tiles.
How Long to Wait After Filling Before Installing Peel and Stick Tiles
The time you need to wait depends on the concrete filler you use. Some patches set in a few hours, while others need a full day or longer to dry and harden. Therefore, check the product label and follow its recommended waiting time before installing your tiles.
However, do not assume the patch is ready just because the top feels dry. The material underneath may still be soft, so give it enough time to harden fully before covering it.
Once the recommended time has passed, check these two things:
- Check the patch: Press it with your thumbnail. It should feel hard, not soft or crumbly.
- Clean the floor: Sweep and vacuum the entire area to remove dust and loose bits that could stop the tile adhesive from sticking properly.
Quick tip: Try a spare tile. If you want an extra check, stick a spare tile over the fully cured patch and leave it for about 24 hours. Then check whether it stays firmly attached. If it lifts easily, dust, leftover moisture, or a surface problem may be affecting the bond. This is a simple extra check, not a manufacturer-approved test, so always follow the instructions for your tile and filler.
What if a Concrete Crack Keeps Reopening (How to Fix)
If you fill a crack in your concrete floor but it opens again, you need to find out why before you cover it with peel and stick tiles. Your slab may still be moving, so the same crack can return even after you repair it. Look for these signs to check whether the problem is continuing:
The crack gets wider: If you notice the gap growing over time, the concrete may still be moving.
The crack opens again after filling: If the filler breaks or separates from the edges, the crack may be moving beneath the repair.
One side sits higher than the other: If you can feel a step across the crack, the concrete may have shifted vertically.
If you see any of these signs, filling the surface again may not solve your problem because the movement can cause the filler to crack once more. As a result, the damaged line may show through your thin peel and stick tiles or cause them to lift.
For a minor crack with limited movement, you may be able to use a flexible filler that is specifically made for moving cracks. However, check that the product is suitable for your concrete floor and compatible with your planned flooring. If the crack keeps coming back, gets wider, or develops a raised edge, ask a concrete professional to inspect your slab before you install the tiles. That way, you can address the cause instead of repeatedly repairing the same spot.]
Common Mistakes to Avoid When Filling Concrete Before Peel and Stick Tiles
A small mistake during concrete repair can affect how well your peel and stick tiles sit and stay in place. So, watch out for these common problems before you move on to flooring.
- Adding too much patch: If you leave extra filler above the concrete, it can create a raised ridge under your tiles. Scrape away the excess so the repaired area sits even with the surrounding floor.
- Using ordinary caulk or silicone: These materials may not provide a suitable surface for tile adhesive to bond to. Instead, choose a concrete repair product approved for use under vinyl flooring.
- Leaving dust inside the crack: Dust and loose concrete can weaken the repair because the filler needs a clean surface to bond properly. Brush out the crack and vacuum the debris before you apply the filler.
- Installing tiles before the patch is ready: Even if the surface feels dry, the filler may still need time to harden. Therefore, follow the product’s recommended drying and curing time before covering the repair.
- Skipping the straightedge check: Your repair may look smooth but still have a raised edge or dip. Run a straightedge across the area so you can spot uneven places before installing your tiles.
- Filling an expansion joint with rigid patch: These joints allow your concrete slab to move, so a hard patch may crack when the joint expands or contracts. Check your flooring manufacturer’s instructions for the correct way to handle the joint before covering it.
FAQs
Can you put peel and stick tiles over hairline cracks in concrete?
You may be able to cover a hairline crack if it is stable, flat, and smooth, but check your flooring manufacturer’s instructions first. If the crack has a rough edge, leaves a gap, or creates an uneven surface, repair it before laying the tiles.
Can you use regular cement to fill holes in a concrete floor?
Regular cement is not always the best choice because it may shrink or fail to bond well in a small hole. Instead, you should choose a concrete patch that suits the size and depth of the damage and is approved for use under vinyl flooring. This gives you a more suitable base for your peel and stick tiles.
Do concrete cracks need to be completely dry before filling?
Yes, unless your repair product specifically allows application to damp concrete. Moisture can affect how some fillers bond and harden, so check the product instructions before you start. If water keeps coming through the crack, find the source before repairing it.
Why does concrete filler sink after you repair a hole?
Your filler may sink if the hole is too deep for one application or the product shrinks as it dries. Check the label for the maximum depth you can fill at once. If the hole needs several layers, let each layer set as directed before adding more material.
Ending Note
Once you fill the cracks and holes, give the repairs enough time to harden and check that the surface is firm and even. This helps your peel and stick tiles bond to the concrete and stay in place longer. If the slab keeps cracking or shifting, fix the underlying problem before covering it.